
Table of Contents
- Understanding the Three Main Stages of Coffee Roasting
- Stage One: The Drying Phase
- Stage Two: The Maillard Reaction Phase
- Stage Three: The Development Phase
- First Crack vs. Second Crack: What You Need to Know
- Small Batch Roasting Benefits for Flavor Development
- Troubleshooting Common Roast Defects
- Frequently Asked Questions
Last Updated: September 19, 2026
Understanding the Three Main Stages of Coffee Roasting
Understanding coffee roasting stages means learning the three main phases: the drying phase, the Maillard reaction phase, and the development phase. Each transforms green beans through distinct chemical and physical changes that impact flavor, aroma, and body, helping you make intentional adjustments to create the coffee roasting stages you want.
Small-batch roasting gives precise control over these phases. You can monitor each stage carefully and respond to what the beans tell you through color, sound, and aroma.
The journey takes roughly 12 to 15 minutes. What matters most is recognizing the signals that tell you when to move forward.
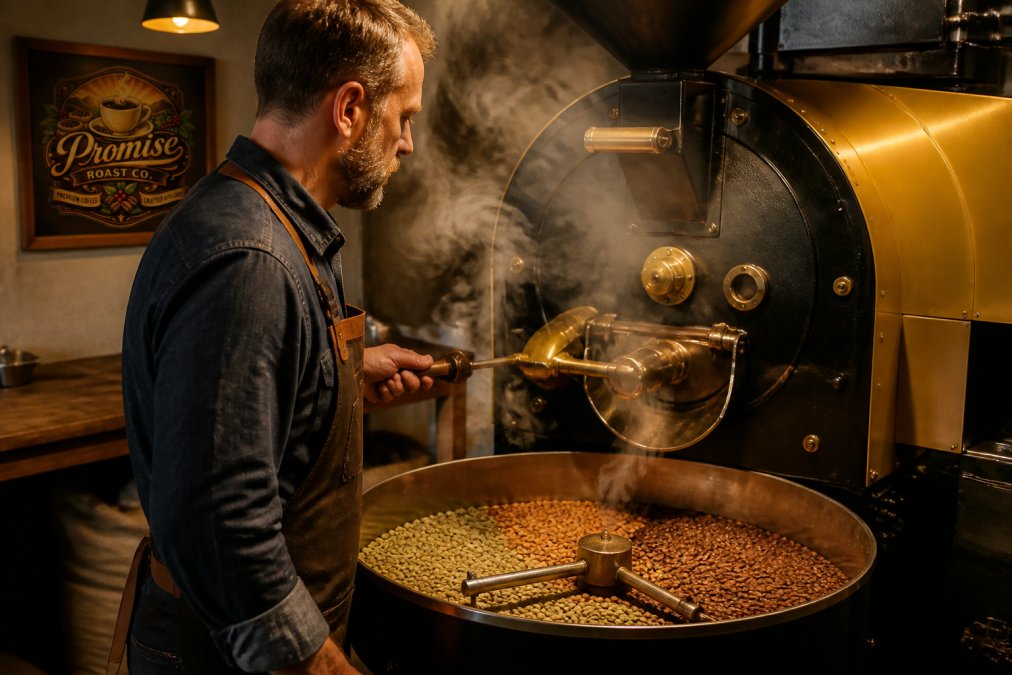
Stage One: The Drying Phase
The drying phase begins with green beans at 10-12 percent moisture. Heat must drive off this moisture before flavor develops. This phase typically lasts 4-5 minutes.
Beans absorb heat through conduction and convection, losing their blue-green color and turning yellow or light brown as internal moisture creates steam and the bean expands slightly.
What Happens During the Drying Stage
Drying is endothermic: water evaporates and escapes as steam, temporarily slowing the roast. Bean density decreases, making it porous and ready for chemical reactions. Rush drying and the interior won’t be ready for flavor; linger too long and beans become baked and flat.
Visual and Auditory Cues in the Drying Phase
Watch for color shift from blue-green to yellow to light tan. Listen for subtle crackling as steam escapes. Smell a grassy or hay-like aroma, all signals that moisture is leaving and the bean is preparing for the next phase.
Stage Two: The Maillard Reaction Phase
The Maillard reaction phase begins around minute 5-6 and lasts 3-4 minutes. Amino acids and reducing sugars react with heat, creating hundreds of new flavor compounds. This exothermic reaction releases thermal energy, accelerating the roast as beans shift from light tan to medium brown.
Chemical Changes in Coffee Beans During Maillard
Maillard produces complex flavor compounds: sugars caramelize for sweetness and body, acids break down reducing sharpness, and volatile aromatic molecules multiply. New pigments form, deepening color as interior temperature drives the reaction.
During Maillard, small heat adjustments matter enormously. Lowering heat slightly extends the phase and deepens complexity; increasing heat rushes through it, creating a thin or underdeveloped cup.
How Roasting Affects Flavor Profiles at This Stage
Light roasts finish as Maillard peaks, preserving acidity and origin characteristics. Medium roasts extend through Maillard fully, balancing origin flavor with roast-developed sweetness and body. Dark roasts push past Maillard, with roast flavor dominating and origin qualities fading.
Stage Three: The Development Phase
The development phase is the final stage, lasting 2-3 minutes, where you decide roast degree. Heat drives chemical reactions, volatile compounds escape (degassing), and flavors settle into final form.
Development Time Ratio in Coffee Roasting
Development time ratio is the percentage of total roast time in development. A 20-25 percent ratio (2.5-3 minutes of a 12-minute roast) is standard. Shorter ratios create lighter, more acidic roasts; longer ratios create darker, heavier ones. Small-batch roasting lets you adjust heat in real time to hit your target ratio precisely.
Caramelization and the Role of Heat in Roasting
Caramelization accelerates during development, with sugars breaking down to create bitter and roasty notes needed for balance. Heat transfer relies on convection; uneven air flow creates uneven roasts. Steady, moderate temperature increases create smooth, balanced roasts; sharp spikes scorch surfaces while interiors remain underdeveloped.
First Crack vs. Second Crack: What You Need to Know
First crack and second crack are audible signals that mark roast progression. Both sound like popcorn popping, though second crack is quieter and more rapid. Understanding the difference helps you nail your roast degree.
Identifying and Responding to First Crack
First crack occurs around minute 8-9 when internal pressure splits the bean’s structure, releasing a sharp popping sound like distant fireworks. It marks the transition to development and signals that flavor development is underway. When first crack begins, you decide: finish soon for a lighter roast, or continue for a darker one.
When Second Crack Occurs and What It Means
Second crack occurs 1-2 minutes after first crack ends, sounding like rapid machine-gun fire. Reaching it means a dark roast. Most specialty roasters stop before second crack. First crack is your main decision point; second crack is a reference marker for very dark roasts.
Small Batch Roasting Benefits for Flavor Development
Small-batch roasting (1-5 pounds) improves heat distribution, ensuring every bean receives consistent thermal energy and eliminating uneven roasts. You adjust heat in real time based on observation and sound. At Promise Roast Co., we roast your order after you place it, ensuring peak freshness within days with volatile compounds still present when you brew.
Troubleshooting Common Roast Defects
Roast defects result from specific errors during one of the three phases. Phase-to-defect mapping lets you diagnose and correct issues with precision instead of guessing.
Drying Phase Errors and Their Cup Signatures
Too-Long Drying Phase → Baked, Flat, Hollow Cup
Lingering in drying too long dries the bean’s interior before flavor develops, creating a baked, flat, hollow cup lacking sweetness and body. Root cause: drying lasted 6+ minutes or temperature was too low. Fix: increase roaster temperature by 50°F at the start and complete drying in 4-5 minutes. When crackling softens around minute 4, increase heat to accelerate the transition into Maillard.
Too-Short Drying Phase → Grassy, Sour, Underdeveloped Cup
Rushing through drying leaves interior moisture, interfering with flavor and creating a sour, grassy, underdeveloped cup. Root cause: drying lasted 3 minutes or less. Fix: start with moderate temperature (350-375°F) and hold steady for 4-5 minutes. Once color reaches light tan, increase heat to accelerate Maillard.
Maillard Reaction Phase Errors and Their Cup Signatures
Too-Short Maillard Phase → Thin, Sour, Underdeveloped Sweetness
Rushing through Maillard leaves insufficient flavor compounds, creating a thin, sour cup lacking sweetness. Root cause: Maillard lasted 2 minutes or less. Fix: after drying ends, increase heat moderately and aim for 3-4 minutes in Maillard. When first crack begins, continue for another 1-2 minutes to allow flavor compounds to fully develop.
Too-Long Maillard Phase → Bitter, Burnt, Roasty Cup
If you extend the Maillard phase too long, you overshoot into the development phase prematurely. The cup becomes bitter and burnt, with roast flavor dominating origin character.
How to identify this defect: The cup tastes bitter and burnt, with charred or ashy notes. Origin flavor is completely masked by roast character. The aroma is acrid. The cup lacks the balance between origin and roast flavor that defines a well-executed roast.
Root cause: Maillard phase lasted 5+ minutes, or roaster temperature was too high during this phase. Heat accelerated the Maillard reaction and pushed the roast into development before you intended.
How to fix it next time: Moderate your heat increase after drying. Aim for a roaster temperature that rises steadily but not aggressively.
Development Phase Errors and Their Cup Signatures
Too-Short Development Phase → Sour, Thin, Underdeveloped
If you finish the roast too early in the development phase, the cup tastes sour and thin, lacking the body and sweetness that develop during this stage.
Too-Long Development Phase → Bitter, Heavy, One-Dimensional
Uneven Color and Temperature Control Issues
Uneven color, some beans light tan, others medium brown, signals that heat distribution or air circulation is poor. The result is a cup with conflicting flavors: some beans taste underdeveloped, others taste baked.
Linking Phase Errors to Cup Defects: A Quick Reference
Use this table to diagnose defects and trace them back to the phase where the error occurred:
| Cup Defect | Likely Phase Error | How to Fix |
|---|---|---|
| Baked, flat, hollow | Too-long drying | Increase initial heat; complete drying in 4-5 minutes |
| Grassy, sour, underdeveloped | Too-short drying OR too-short Maillard | Hold steady heat during drying; extend Maillard to 3-4 minutes |
| Bitter, burnt, roasty | Too-long Maillard OR too-long development | Moderate heat increase after drying; finish sooner |
| Uneven color, conflicting flavors | Poor heat distribution or air circulation | Check vents; avoid overfilling; raise early heat to move beans |
| Thin, sour, sharp acidity | Too-short Maillard OR too-short development | Extend Maillard phase; finish 1-2 minutes after first crack |
Frequently Asked Questions
What happens during each of the three main stages of coffee roasting?
The drying phase removes moisture from green beans and prepares them for heat-driven reactions. The Maillard reaction phase generates flavor compounds and aroma development as bean temperature rises. The development phase deepens those flavors through caramelization and continues until first or second crack. Together, these three stages transform raw green beans into the coffee roasting stages that define roast profile and final cup quality.
What is the difference between first crack and second crack in coffee roasting?
First crack occurs when internal pressure from gases and moisture builds enough to fracture the bean structure, usually around 350-400°F. This marks the transition from development phase into light roasts. Second crack happens at higher temperatures (410-430°F) when cell walls break further, indicating darker roasts. First crack vs second crack determines roast degree: first crack yields brighter acidity, while second crack produces fuller body and lower acidity.
Why is small batch roasting better than mass-produced coffee?
Small batch roasting benefits include precise temperature control and attention to individual bean behavior. Roasters can adjust heat transfer and rate of rise in real time, catching defects before they ruin an entire batch. Mass production prioritizes speed over sensory evaluation, often resulting in uneven roast profiles. Small batch methods allow roasters to optimize each roast for peak flavor development and consistency.
How long should the development phase last in coffee roasting?
Development time ratio in coffee roasting typically spans 15-25% of total roast time. If your total roast is 12 minutes, development should last roughly 2-3 minutes after first crack. This window is critical: too short and the roast tastes underdeveloped or sour; too long and it becomes baked and flat. The exact development time ratio depends on bean density, desired roast degree, and your equipment’s heat transfer characteristics.